
An Alarms Report is a table of all Data type events that have been generated by one or more alarm settings within a specified time range.
Report Type
The first step in the process of creating a report is to select the report type. This determines the type of report that will be created and the fields that will be displayed in the other steps of the process.
1. Select Alarms report from the drop-down list.
Alarm Settings
The next step in the process to select the alarm settings for which data events will be recorded in the resulting report.
The Alarm settings drop-down list is populated with all alarm settings that have been defined in the Alarms List page. Multiple alarm settings can be selected if needed. By default, alarm settings that have been disabled are not included in the list of available settings. The Include inactive alarm settings check box can be populated to include these settings in the list.
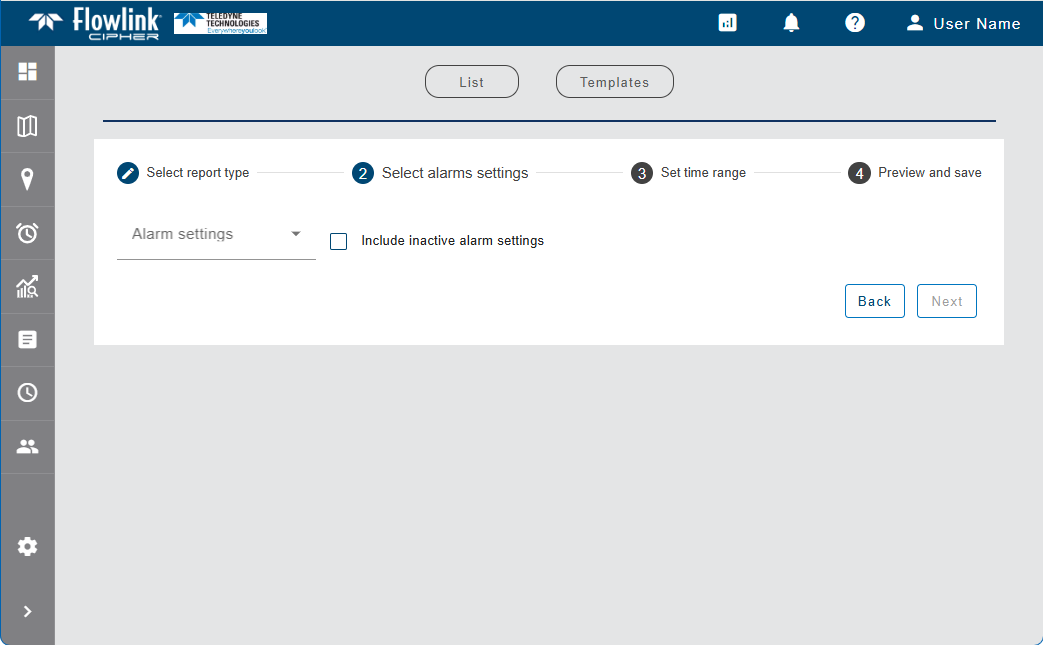
1. Select an option from the drop-down list.
Time Range and Interval
Next the time range and interval for the report must be defined.
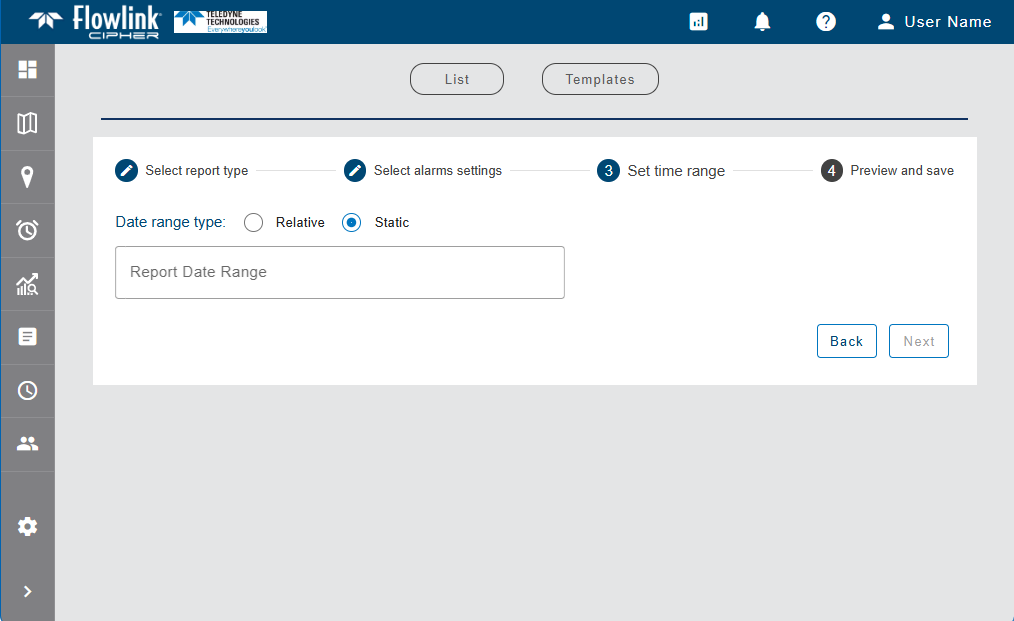
The time range can be defined as:
• a relative time period, such as This Week or This Month. This option also allows a custom number of days, month, years, etc. to be specified for the range.
• a static time period defined by start and end dates.
To define a static time range:
1. Select the Static option.
2. Click the Date Range field to display a calendar widget.
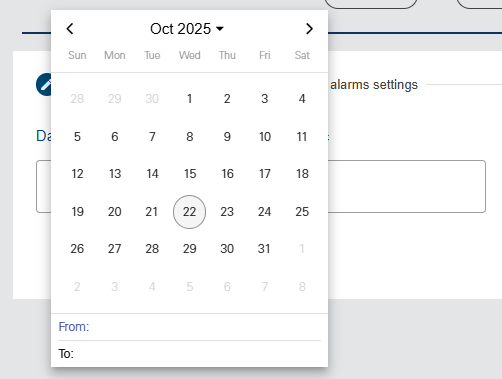
3. Click the desired start date and end date.
The widget is closed and the selected range is displayed in the field.
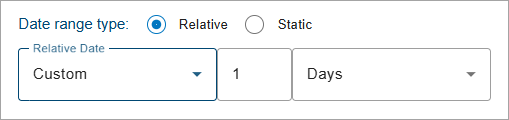
To define a relative time range:
1. Select the Relative option.
2. Select an option from the Relative Date drop-down list.
3. If Custom is selected, enter a numeric value and select a measure of time from the drop-down list.
Preview and Save
When all fields have been completed, the Preview button is enabled. This is used to preview the report and summary table of the selected data and then save it to the database and/or export it to PDF or CSV format. The Save to database and Download buttons will not enable until a preview has been generated. The preview allows the report settings to be adjusted if needed before creating the final report.
1. Click Preview to view the report.

The report preview is displayed in the application. The columns of data in the report provide the status, start and end times, and duration of each event that matches the settings selected for inclusion in the report.
The preview displays a maximum of 10 events by default. This limit can be changed using the Items per page control below the list. Navigation options also appear below the list when the number of events exceeds the set limit and more pages are needed. This control reports the total number of events in the report and the number of events displayed in the current page of the list.
2. Select an option from the Items per page drop-down list.
3. Click the Next or Previous arrow to view a different page of the report.
If changes are needed in the report settings, click the Edit button to return to the settings page.
To save the report to the database:
4. Click Save.
A dialog box is displayed with the following options:

• Report name: The name to assign to the report. By default, this is populated with the report type, the site name and the creation timestamp.
• PDF: Save the report to the Cipher database in PDF format. This option makes the report available for other users to download and view at any time. The data itself is not saved with the report, only the report is stored.
• CSV: Save the report to the Cipher database in CSV format. This option makes the report available for other users to download and view at any time. The data itself is not saved with the report, only the report is stored.
• Save as template: Create a report template using the settings defined for this report. The template can then be used to create future reports. See Report Templates for more information on report templates. If this option is enabled, additional fields are added to the dialog box.
5. [Optional] Edit the Report name, if needed.
6. Click the check box for each output format to be saved.
7. [Optional] Click the Save as template check box.
Additional fields are added to the dialog box.

8. Enter a Template Name and Template Description.
9. Click the Public Template check box if the template will be available to other users.
10. Click Save.
A message will be displayed stating that the report was saved to the database in the selected format(s) and is now available in the list on the Reports List page.
If Save as template was selected, the template is now available from the Templates page.
To download the report to a file:
1. Click Download.
A dialog box is displayed with the following options:
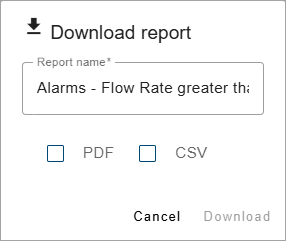
• Report name: The name to assign to the report. By default, this is populated with the report type, the site name and the creation timestamp. This will also be used in the file name of the resulting file.
• PDF: Download the report as a file in PDF format.
• CSV: Download the report as a file in CSV format.
2. [Optional] Edit the Report name, if needed.
3. Click the check box of each output format to be created.
4. Click Download.
A Save As dialog box is displayed.
5. Specify a name and location for each file format and click Save to export the files.