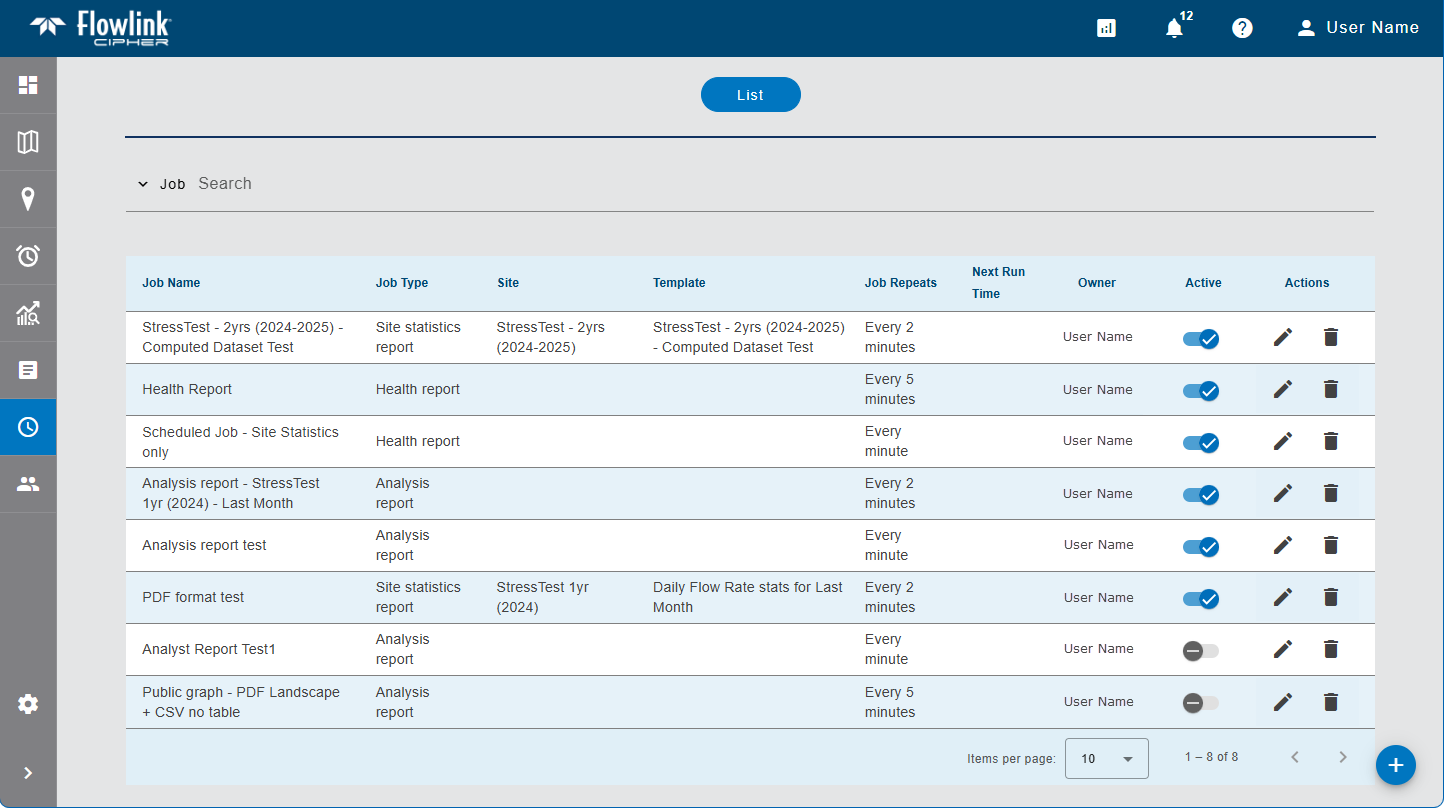
The List screen of the Scheduler tool provides a list of all scheduled jobs that have been created for the current Cipher instance.
A job schedule is used to automatically generate a Health, Site Statistics, Alarms or Analysis report on a regular time interval. The type of report generated and the interval are determined by the options selected by the user when the job was created. The reports are created in PDF or CSV form and emailed to the creator of the job and any other Cipher users or external email addresses specified during job creation. For Site Statistics reports, the PDF is also saved to the reports database where it can be downloaded as needed.
Jobs are created using the Create new scheduled job button  in the top-right corner of the table. See Create Scheduled Job for information on creating jobs and the different types.
The list provides the following information for each scheduled job:
Column | Description |
|---|---|
Job Name | The name specified for the job. |
Job Type | The type of report that will be generated by the job. This will be one of: • Health • Site Statistics • Analysis • Alarms |
Site | The name of the site from which information will be collected when generating the report for the job. |
Template | The name of the template that will be used to create the report generated by the job. |
Job Repeats | The interval at which the job will be run. |
Next Run Time | The date and time that the job will be run next. If the job is set to Inactive, this value will not be populated. |
Owner | The name of the Cipher user that created the job schedule. |
Active | The status of the job. This is a toggle control that can be set to either: • Active: In this state, the job will run as scheduled. • Inactive: In this state, the job will not run. This can be used to stop reports from being generated without deleting the job. 1. Click the button to change the state of the job. |
Actions | Edit: This is used to change the settings of a job after it has been created. Existing reports already generated by the job will be unchanged, only reports generated after the changes have been applied will be affected. Jobs can only be edited by the user that created them or by users with the Administrator role in the same tenant as the user that created the job. 1. Click Edit to open the Edit Scheduled Job page pre-populated with the settings for the job. 2. Make any necessary changes to the job settings. 3. Click Update. |
Delete: This is used to stop the job from running and permanently delete it from the system. 1. Click Delete to remove the job. A message will be displayed to confirm the removal. 2. Click Yes to complete the removal of the job. |
If Preferred Tags have been specified in the Preferences tab of the current user profile, the list will display a "Tags applied" indicator and the list will automatically be filtered to display only jobs for sites assigned those tags. See Preferences for more information on tags.
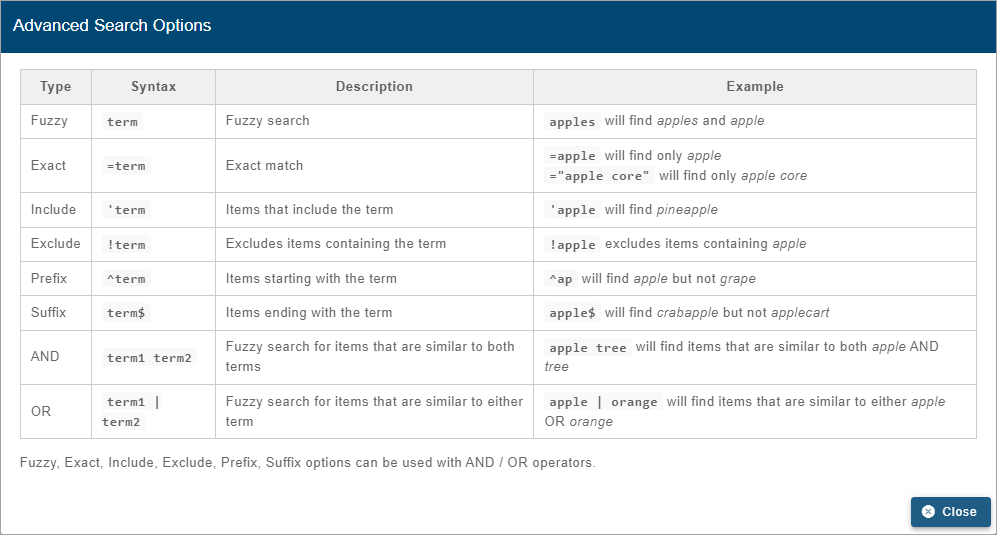
The list of jobs can be filtered by entering text in the Search field at the top of the screen. Only jobs with text that match the text specified will be included in the list. Advanced Search characters can also be specified with the text to perform different types of searches, some more specific, some more general. Clicking the Advanced Search Options link below the Search field will display a chart of the possible search types and how to use them. The AND/OR operators can also be used in combination with the other Advanced Search options if needed.
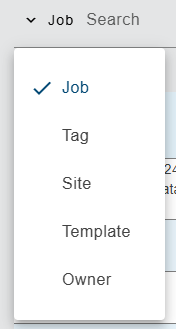
A drop-down list beside the Search field can be used to filter the list even further by specifying the property in which to search for the matching text. Also, when a property is selected from the drop-down list, clicking in the Search field will display a drop-down list of possible values based on the selected property, allowing a value to be selected instead of entering it manually. When an option is selected, only jobs with text in the selected property (job, tag, site, etc.) will be available.
The Scheduler list displays a maximum of 10 items by default. This limit can be changed using the Items per page control below the list. Navigation options also appear below the list when the number of items exceeds the set limit and more pages are needed. This control reports the total number of jobs in the complete list and the number of jobs displayed in the current page of the list.
The list can also be sorted by clicking on a column heading. This will sort the table in either ascending or descending order according to the values in the selected column. Clicking the same column heading a second time, which switch the sort order from either ascending or descending, depending on the current order.
1. Select an option from the Items per page drop-down list.
2. Click the Previous or Next single arrow button, or the First or Last double arrow button to view a different page of jobs.