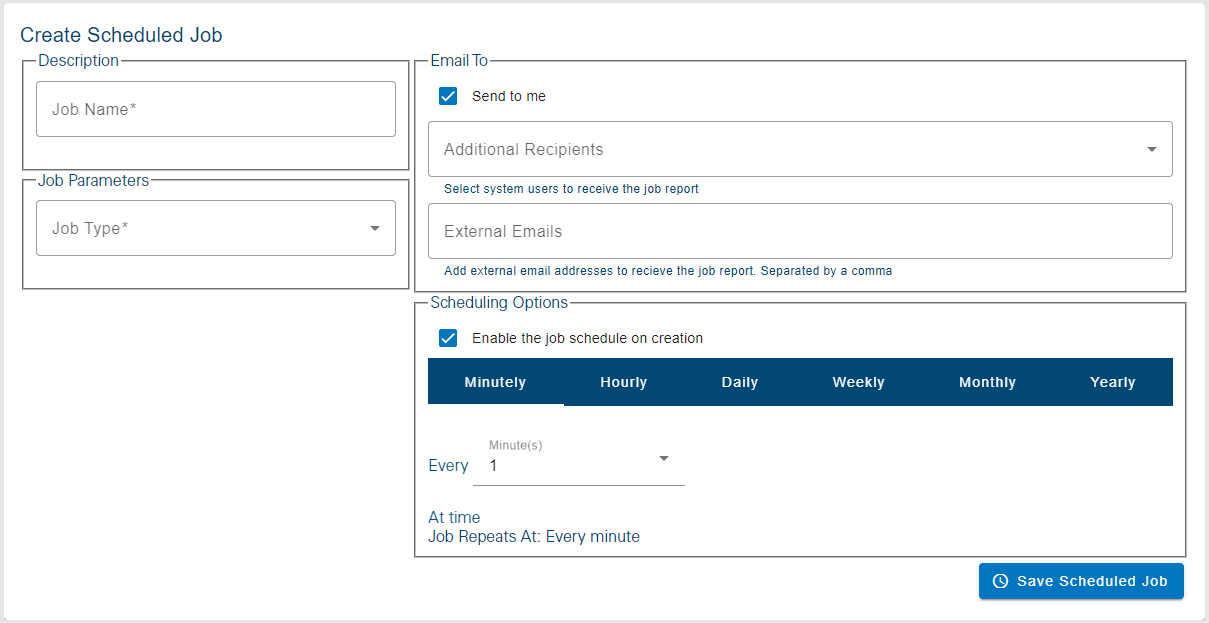
The Create Scheduled Job page of the Scheduler tool is used to create new job schedules. Jobs can be created to automatically generate a report. When a job is run, the report is saved to a PDF and stored in the reports database. It is also emailed to the creator of the job, as well as any other email addresses specified in the job details.
The options for creating a job are described below. Click to expand each item.
Description
The following options are provided in the Descriptions settings:
• Job Name: The name to assign to the job. This name will be displayed in the Scheduler List screen.
Job Parameters
The job parameters determine what type of job will be created and what will be included in the resulting report. Different parameters are available depending on the type of report being created.
The following options are provided in the Job Parameters settings:
• Job Type: The type of report that will be created by the job. The options are:
• Analysis report: This job type creates a report of the most up to date data contained in a graph. The report can include a private graph created by the current user or any public graph.
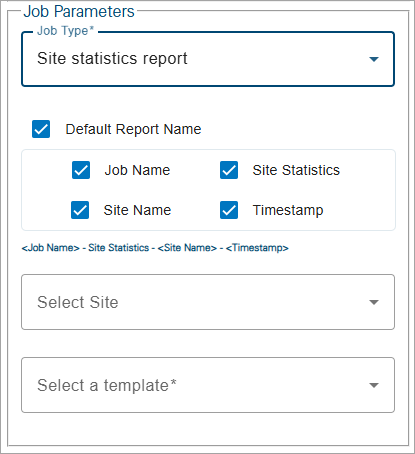
• Site statistics report: This job type creates a summary report of statistics for a site based on the selected site, datasets, statistic type and interval. Selecting this type will display additional fields required to create the report.
Site statistics reports are created using an existing report template. If a report template is not available, the job cannot be run. See Report Templates for information on templates. |
• Health report: This job type creates a table of health information for all sites in the tenant of the current user. Health information includes things like the site name, its status, the timestamp of the last data push from the site, metadata about the site devices and battery voltage.
• Alarms report: This job type creates a report of all data events triggered by user-specified alarm settings. Selecting this type will display a Template field, where an alarm settings template will be selected to create the report.
• Default Report Name: This is the name that will be assigned to the report when the job is run. This is generated automatically based on elements chosen to be included in the name.
• For an Analysis report, there are 3 possible elements that can be included in the name:
• the name specified in the Job Name field,
• the name of the graph selected for inclusion in the report, and
• the timestamp of when the report was created.
• For a Site Statistics report, there are 4 possible elements that can be included in the name:
• the name specified in the Job Name field,
• the statistic selected for inclusion in the report,
• the name of the site selected for inclusion in the report, and
• the timestamp of when the report was created.
• For a Health report, there are 3 possible elements that can be included in the name:
• the name specified in the Job Name field,
• the URL of the health report, and
• the timestamp of when the report was created.
• For an Alarms report, there are 3 possible elements that can be included in the name:
• the name specified in the Job Name field,
• the alarm settings template that will be used to populate the report,
• the timestamp of when the report was created.
• Select a graph: This parameter is used to select the graph to be included in an Analysis report. The list will contain all graphs that are accessible to the user, including any private graphs created by the current user and all public graphs. The list can be filtered by entering text in the field. Only sites that match the text specified will be included in the list. This field is only displayed if the Job Type is set to Analysis report.
• Site Selection: These parameters are used to select the site to be included in the report and the information that will be included from that site. These fields are only displayed if the Job Type is set to Site statistics report. For a Health report, all sites that the current user account has access to will be included in the report, site selection is not required.
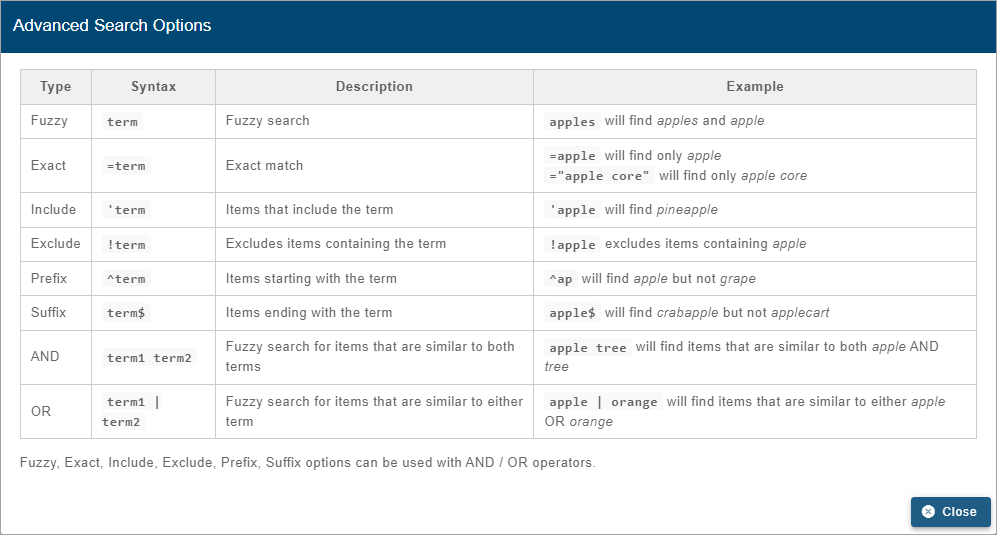
• Select a site: The site for which the report will be created. This list will contain all sites that are accessible to the current user. If the user has been assigned to a tenant, the list will only contain sites in that same tenant. Similarly, if Preferred Tags have been specified in the Preferences tab of the current user profile, the list will display a "Tags applied" indicator and only sites assigned those tags will be included in the list. If the "Show inactive sites..." option has not been enabled in the Preferences tab, only active sites will be available. See Preferences for more information on these options. The list of sites can be filtered by entering text in the Search field at the top of the list. Only sites that match the text specified will be included in the list. Advanced Search characters can also be specified with the text to perform different types of searches, some more specific, some more general. Clicking the Advanced Search Options link below the Search field will display a chart of the possible search types and how to use them. The AND/OR operators can also be used in combination with the other Advanced Search options if needed.
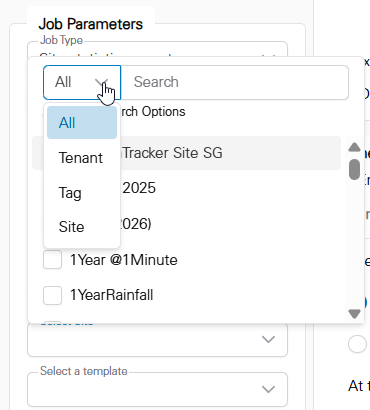
A drop-down list beside the Search field can be used to filter the list even further by specifying the property in which to search for the matching text. Also, when a property is selected from the drop-down list, clicking in the Search field will display a drop-down list of possible values based on the selected property, allowing a value to be selected instead of entering it manually. When an option is selected, only sites with text in the selected property (tenant, tag, etc.) will be available. Click on a site in the list to select it.
• Select a template: The template that will be used to create the report. This field is only displayed if the Job Type is set to Site Statistics report or Alarms report.
• For a site statistics report, the template controls which statistics will be calculated and which dataset(s) will be used as the data source for the statistics. The list will contain all templates that have been created by the current user and any public templates that have been created in the Cipher instance.
• For an alarms report, the template defines the alarm settings for which data events will be included in the report. These templates are in the form of Alarm reports that have been created in the Reports screen. See Alarms Report for more information.
• Output parameters: These parameters are used to define how an Analysis report will be formatted and the file format that will be used. These fields are only displayed if the Job Type is set to Analysis report.
• PDF: Enable this option to have the report generated as a PDF file. Note, the graph image will not be included in the file.
• Portrait/Landscape: The page orientation of the output if the PDF option is enabled. Select the Portrait orientation to have the report created in a vertical layout and the Landscape orientation to have the report created in a horizontal layout.
• CSV: Enable this option to have the report generated as a CSV file.
• Include summary table: Enable this option to include the summary table of the data in the CSV file.
1. Select a Job Type from the drop-down list.
2. Specify a name for the report generated by the job:
• To specify a name manually, clear the Default Report Name check box and type a name in the Report Name field.
• To have a name generated automatically, enable the Default Report Name check box and select the elements to be included in the name. At least 1 element must be selected to generate a default name.
3. If necessary, select the graph, or site and template, to use for the report.
Email To
The Email To settings control which email addresses will receive a copy of the reports generated by the job.
• Send to me: Enable this option to send a copy of the report to the current user. This option is enabled by default.
• Additional Recipients: Select additional Cipher users to have a copy of the report emailed to those users.
1. Click the drop-down arrow to expand a list of all users in the same tenant as the current user.
2. Click the check box of each user that will receive a copy of the report.
• External Emails: Enter email addresses of people outside of the Cipher system to have a copy of the report emailed to those addresses. Each email address should be separated by a comma.
• PDF/CSV: The file format in which the report will be emailed to the specified email addresses. The options include PDF (portable document format), CSV (commas-separated values) or both. This option is only displayed if the Job Type is set to Site statistics report.
Scheduling Options
The Scheduling Options settings are used to define when the job will run. Each time the job is run, a report is generated and sent to the email addresses specified.
• Enable the job schedule on creation: Enable this option to set the job schedule state to Active once the job has been created. If this option is not enabled, the job will be in the Inactive state and will not be run on the specified interval. This option is enabled by default.
• Every: The interval at which the job will be run. The interval can be defined as a specific number of Minutes, Hours, Days, Weeks, Months or Years.
1. To choose the type of interval, select the unit in the blue bar at the top of the field.
Different fields will be displayed in the field based on the unit selected.
Minutely
This interval will run the job each time a set number of minutes has passed.
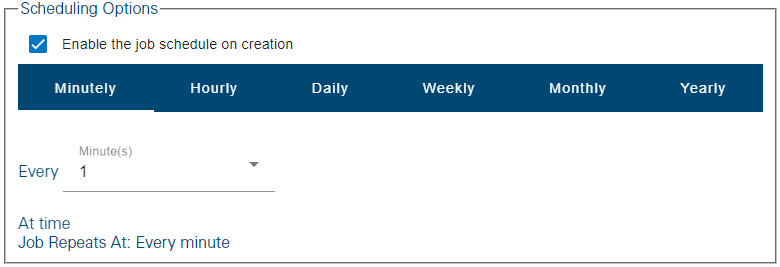
1. Select the number of minutes to use as the interval for generating reports. The default is every minute.
Hourly
This interval will run the job each time a set number of hours has passed.
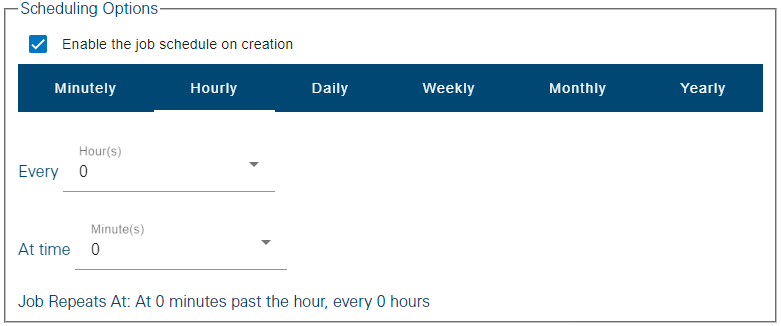
1. Select the number of hours and minutes to use as the interval for generating reports. The default is every hour.
Daily
This interval will run the job at a specific time of day after a set number of days has passed or each week day (Monday to Friday).
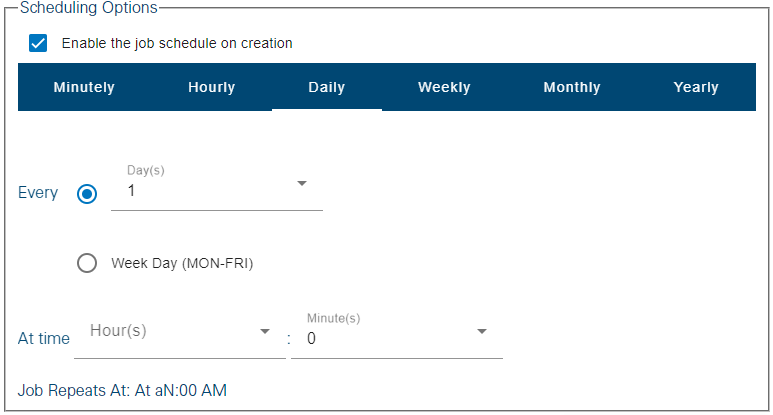
1. Select whether to run the job on week days or a specific number of days.
2. Specify the time of day to run the job by selecting the hour and minute of the time.
Weekly
This interval will run the job every week on the specified day(s) and time.
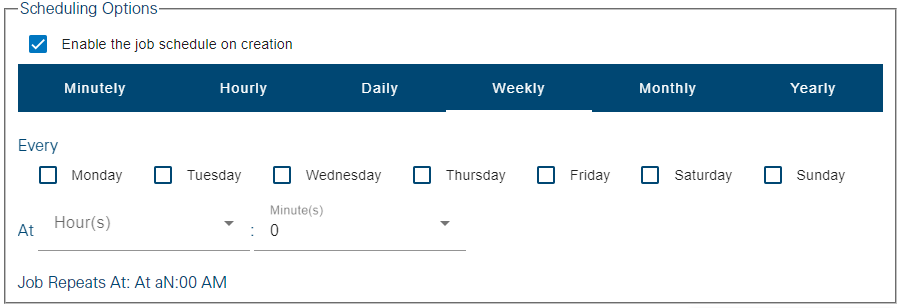
1. Click the check box of each day that the job should be run.
2. Specify the time of day to run the job by selecting the hour and minute of the time.
Monthly
This interval will run the job on a specific day and time each month. The day can be specified as a numerical date or a day of the week in a certain week of the month (first, second, etc.). The recurrence can be each month or a certain number of months.
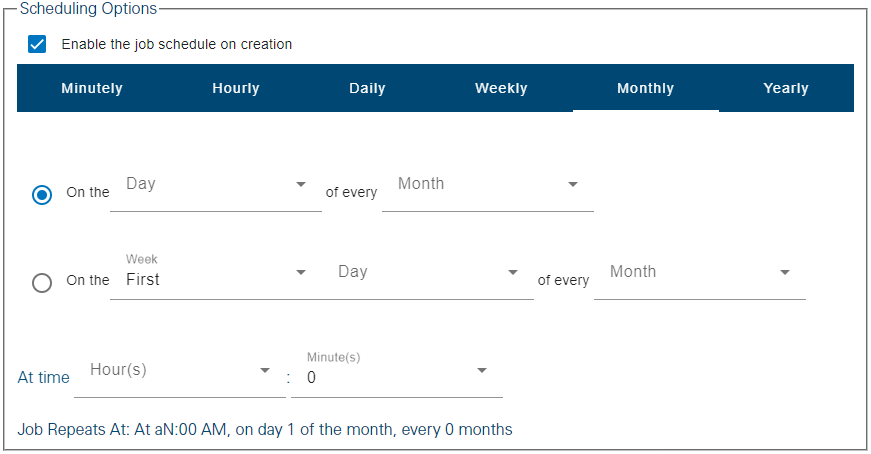
1. Select whether to specify a numerical date or a day of the week.
2. For the day of the job, either:
• Select the numerical date from the drop down list.
• Select the week of the month and the day of the week.
3. Select the number of months to include in the interval.
4. Specify the time of day to run the job by selecting the hour and minute of the time.
Yearly
This interval will run the job on a specific day and time of a specific month each year. The day can be specified as a numerical date or a day of the week in a certain week of the month (first, second, etc.).
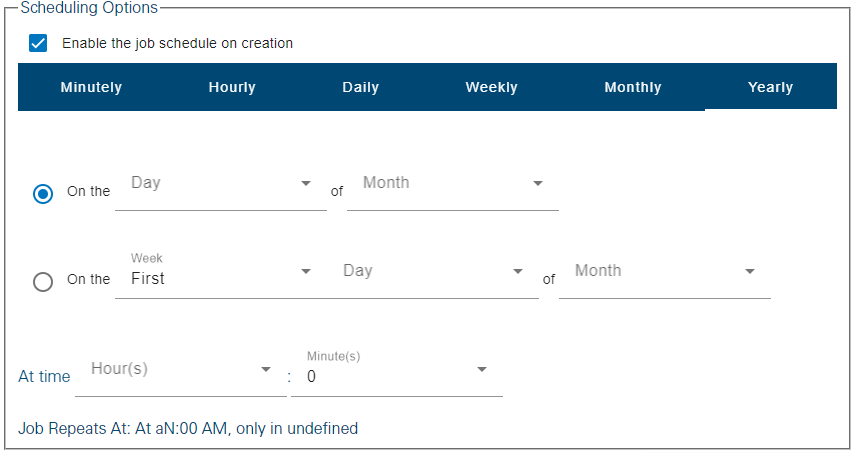
1. Select whether to specify a numerical date or a day of the week.
2. For the day of the job, either:
• Select the numerical date from the drop down list.
• Select the week of the month and the day of the week.
3. Select the month for the interval.
4. Specify the time of day to run the job by selecting the hour and minute of the time.
To create a job schedule:
1. Enter a Name and Description for the job.
2. Select the Job Type.
3. If necessary, select a site and template for the report.
4. Specify the email addresses that will receive a copy of the report.
5. Select the report format(s) that will be included in the email.
6. Define the schedule for the job to be run.
7. Click Create.
The job will be added to the List screen. The state of the job can be changed if needed. See Scheduler List for more information on the List screen.