The Settings page provides access to system information and global settings. Only the Administrator and System Administrator roles can access this page.
The information and settings available on this page is provided in several different tabs, each of which is explained below. The General tab is available for both Administrator and System Administrator users, but all other tabs require the System Administrator role.
General
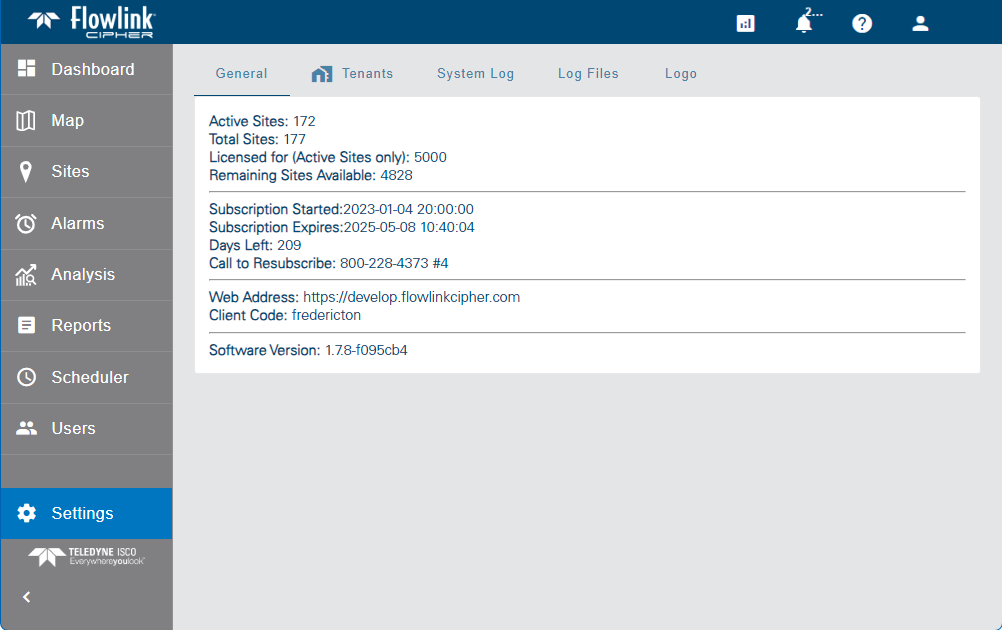
The General tab provides the licensing information for the instance of Flowlink Cipher in use. This information includes:
• The number of active sites currently using the license.
• The total number of sites in the system; this includes both active and inactive sites.
• The maximum number of active sites allowed with the license. If the maximum number of sites has been met, any additional sites will be added to the system, but will not be set to active and cannot receive data.
• The number of remaining sites available for the license.
• The subscription start and expiry dates.
• The number of days left before the expiry date of the license. A series of reminder emails will be sent to the system administrator accounts as the expiry date approaches. Emails will be sent 3 months, 2 months, 1 month and 1 week before the expiry date, as well as daily within the last week.
• The web address to which the deployment is connected.
• The name of the Flowlink Cipher instance to which the user is connected. Each Flowlink Cipher client has a different code.
• The current version of the Flowlink Cipher deployment.
Tenants
The Tenants tab is used to enable and define the tenants functionality.
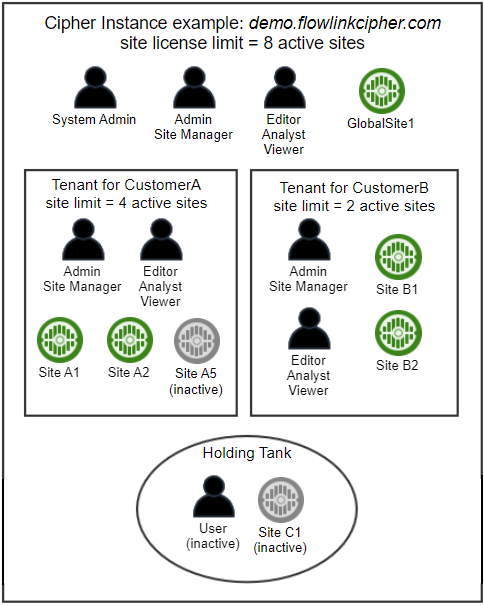
Tenants are used by a system administrator to segment sites and user accounts into separate private areas to control the access that specific user accounts have to a selection of sites. This capability is applicable to Flowlink Cipher subscription owners who are managing the sites and accounts for separate client end users. Only users with the System Administrator role can enable the tenants functionality.

Once the Tenants feature has been enabled and a tenant has been created, user accounts and sites can be assigned to the tenant. Sites that have not been assigned to a tenant will remain in the default Global tenant. Once a user has been assigned to a tenant, they will only have access to sites that have been assigned to that same tenant. The image below shows the potential scenarios involving tenants, users and sites.
1. Click the Tenants tab.
2. Click the Enabled check box to enable the tenant functionality.
3. Click Apply.
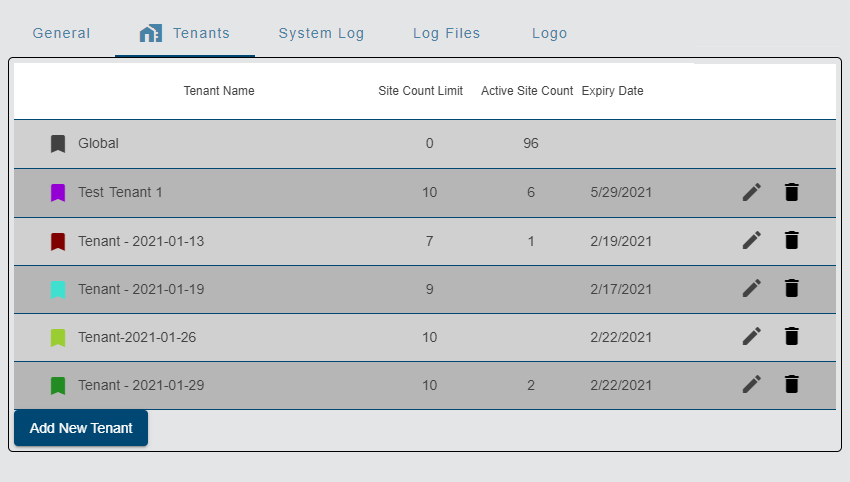
A table is added to the tab, populated with information about the number of active and available sites and the default Global tenant. All tenants other than the default Global tenant must be created manually.
To add a tenant:
1. Click the Add New Tenant button  .
.
A dialog box is displayed to enter a name for the new tenant.
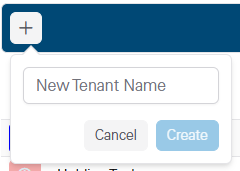
2. Enter a name for the new tenant.
3. Click Create.
The new tenant is added as a new row in the table.
4. Click the Change Tenant Color icon  to assign a color to the tenant.
A color selection tool is displayed.

5. Select the color to assign to the tenant.
6. Click Save.
The dialog box is closed and the tenant color icon is now displayed in the selected color. This color will be used as an identifier when viewing sites and users assigned to the tenant. Next the tenant settings need to be defined.
7. Click the Edit button  for the new tenant.
The Tenant Name, Site Count Limit and Expiry Date fields can now be edited.
• The Site Count Limit is the maximum number of sites that can be assigned to a tenant. New sites created in the tenant when the site count limit has already been met will be created as inactive sites. Data ingested for these sites will not be stored in Cipher.
If a site already in a tenant is set to Inactive, the site will be removed from the tenant’s Active Site Count. |
• The Expiry Date is the expiry for the tenant. After this date, users and sites cannot be added to the tenant. Also, users already assigned to this tenant will not be able to log into the system after this date.
8. Enter the maximum number of sites for the tenant.
9. Enter an expiry date for the tenant.
10. Click the Save button  .
.
Tools are available in various pages to assign users and sites to the tenants as needed. See Sites and Users for information on these tools.
The Delete button  beside each tenant in the table can be used to delete a tenant. When a tenant is deleted, all sites and user accounts associated with the tenant are deactivated and transferred to a "Holding Tank", and then the tenant is deleted. If needed, sites and users can be added to the Global tenant or another tenant to transfer them out of the Holding Tank, at which point they can then be re-activated. See Sites List for information on activating a site.
System Log
The System Log tab contains a log of all activity within the application. Each log entry identifies the activity that took place, the user that made the change (if applicable) and the timestamp of the activity.
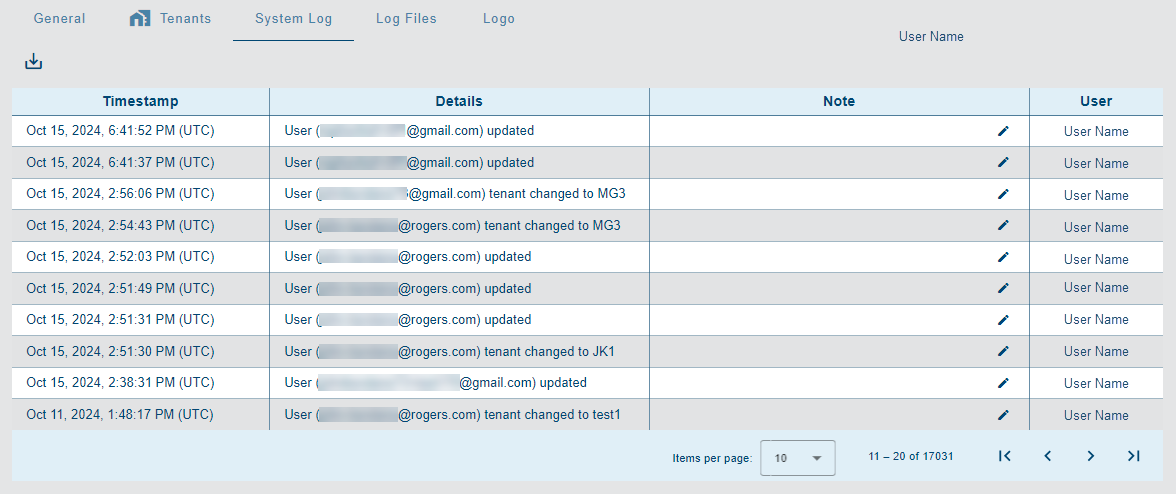
The Download Log File button  above the list can be used to download the log entries to a text file in the browser's default download location. If a default location has not been specified, a Save As dialog box is displayed to select a location.
1. Click Download Log File.
2. Define a name and location for the file.
3. Click Save.
A textual note can be added to an entry, if desired, to provide further information about the alarm. To add a note:
1. Click the Edit note button for the relevant log entry.
2. Enter the text in the dialog box provided.
3. Click the Save button.
Logo
The Logo tab is used to select an image to display as a company logo on the interface of the application.
![]()
The logo will be displayed in the blue menu bar beside the Flowlink Cipher logo at the top of the screen. An example is shown below.
![]()
The supported formats for the logo image are PNG and JPG. When a file has been selected, the image and its file name will be displayed on this tab.
To apply a logo:
1. Clock the Choose File button.
2. A Windows Open dialog box is displayed.
3. Select the relevant image file and click Open.
4. Click the Save logo button ![]() .
.
The image will be applied to the interface. The image can be removed if needed using the Delete logo button  .
.