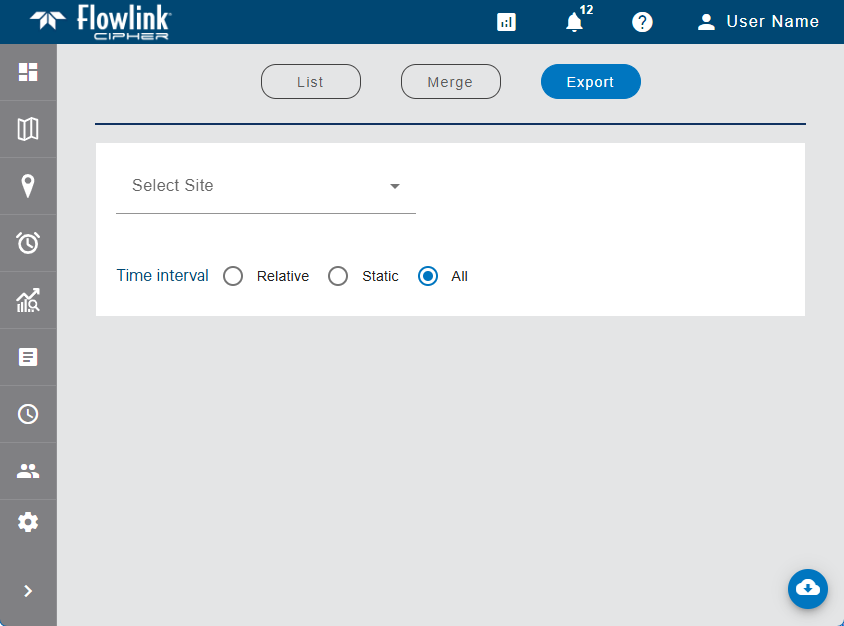
The Site Export screen is used to export data points from Cipher to CSV files.
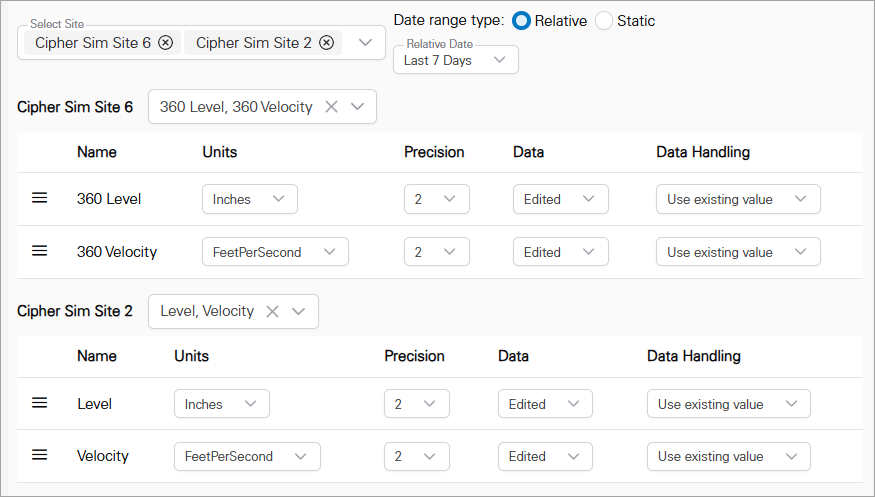
During export, point data from a selection of sites and datasets is output to CSV files. A single export can include one site and one dataset or multiple sites and multiple datasets for each site. A Select site drop-down list is provided to select the specific sites to be included in the export.
Each site exported is saved to a single CSV file, containing the data points for all datasets selected for a site. If multiple sites are exported at once, a separate CSV file is created for each site and the files are automatically saved to a zip. The files are named according to the site name and the timestamp of the export. For a zip file, they are named "Flowlink Cipher - site export", appended with the timestamp of the export. The header of the CSV files will match the header Cipher currently exports from a graph.
1. Click the Select Site field to expand a drop-down list of available sites.
The list contains all sites available to the user. If the user has been assigned to a tenant, only sites in that tenant will be available. Similarly, if Preferred Tags have been specified in the Preferences tab of the current user profile, the list will display a "Tags applied" indicator and only sites assigned those tags will be included in the list. If the "Show inactive sites..." option has not been enabled in the Preferences tab, only active sites will be available. See Preferences for more information on these options.
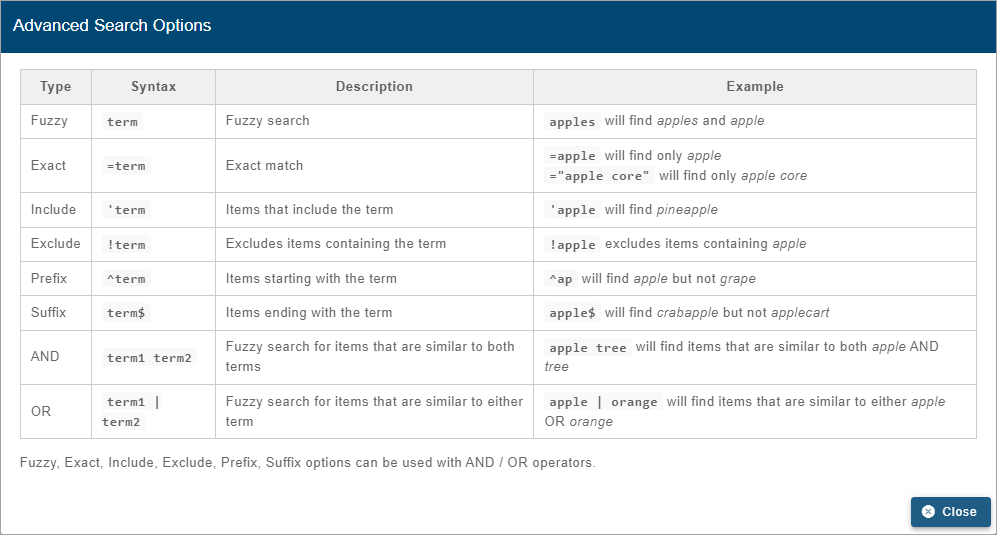
The list of sites can be filtered by entering text in the Search field at the top of the list. Only sites that match the text specified will be included in the list. Advanced Search characters can also be specified with the text to perform different types of searches, some more specific, some more general. Clicking the Advanced Search Options link below the Search field will display a chart of the possible search types and how to use them. The AND/OR operators can also be used in combination with the other Advanced Search options if needed.
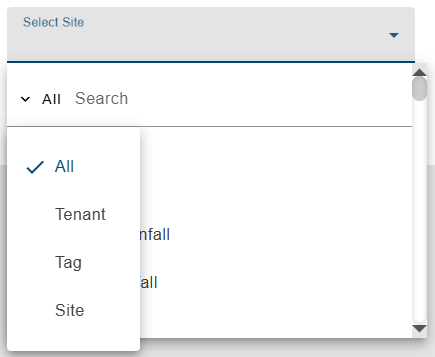
A drop-down list beside the Search field can be used to filter the list even further by specifying the property in which to search for the matching text. Also, when a property is selected from the drop-down list, clicking in the Search field will display a drop-down list of possible values based on the selected property, allowing a value to be selected instead of entering it manually. When an option is selected, only sites with text in the selected property (tenant, tag, etc.) will be available.
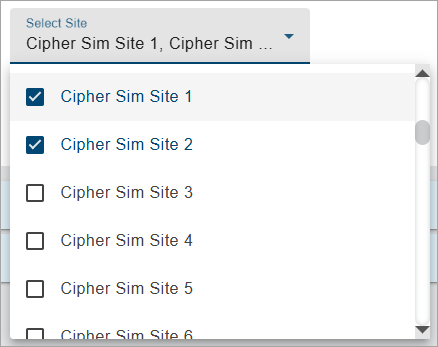
2. Click the check box of each site to be exported.
3. Click outside the sites list to close the list.
The site field now displays the sites that were selected.
The Date range type field is used to define the time/date range of the data to be exported. The range can be specified as a Relative time span, such as the Last 7 Days, or a Static set of start and end dates and times. When a range is specified, only data points within this range will be exported from the selected datasets. If no time range is specified, all data in each dataset will be exported.
4. Choose a Date range type option.
5. [Optional] For a Relative time range, select an option from the Relative Date drop-down list.
[Optional] For a Static time range, click the Date Range field to display a calendar widget then click the start and end dates.
For each site selected, a table was added to the page along with a drop-down list of the datasets available in each site.
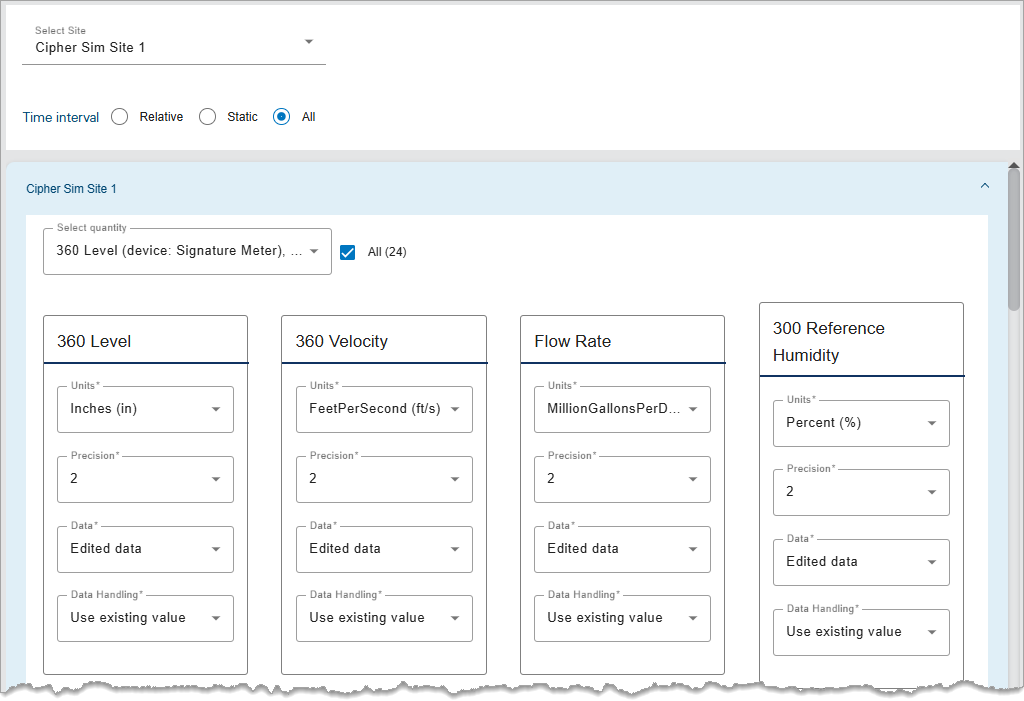
The Select quantities drop-down list is used to select the datasets to be exported. Each dataset is displayed with the quantity name and the device name in case more than one device has a dataset with the same name. A search field is provided at the top of the list to filter the list by name. The check box beside the search field can be used to select or deselect all datasets in the site at once.
6. [Optional] Select/Deselect the All check box.
7. Click the Select quantities field to expand the list of available datasets.
8. Click the check boxes to select or deselect datasets.
9. Click outside the list to close the drop-down list.
The Select quantities field now lists the datasets that were selected. The table was also updated to display the selected datasets. Grab handles at the start of each row can be used to sort the datasets into the preferred order when exported to the CSV file.
The rows also provide the following settings that can be defined for each dataset being exported:
• Units: The unit of measure for the exported values. This will default to the settings in the Preferences tab of the User Profile screen, but can be changed to any unit supported by the data type of the selected dataset. For example, a Temperature dataset will only have Celsius and Fahrenheit as possible values.
• Precision: The number of decimal places that will be included in the exported values. The default is 2 digits to the right of the decimal point.
• Data: Choose whether to include edited data in the export or only the original data values.
• Data Handling: The method that will be used to handle points in the export that have error codes associated with them. This setting overrides the Data Handling option in the Preferences tab of the User Profile screen that is applied to all datasets by default. See Preferences for more information on this option. There are four possible settings:
• Use existing value (default): The point retains its current value.
• Use zero reading: A zero reading will replace the value of the point value.
• Repeat last reading: The point value is updated to use the value of the previous point in the dataset.
• Interpolate: A value is interpolated for the point using the last non-zero, non-error values, before and after the error point(s).
10. Adjust the dataset settings as needed.
11. Click Export  .
.
12. Select the location to save the output file and click Save.
The export is performed and the new CSV file(s) created in the specified location.
Any exported data points with error codes will be handled as defined by the Data Error Handling setting in the Preferences tab of the user’s Profile page. |
Related topics:
• Sites