
Alarms are specific to a site and the data it is providing. To specify the conditions for an alarm, you must select the site and dataset to be monitored.
1. Expand the Sites panel by clicking the Sites tab.
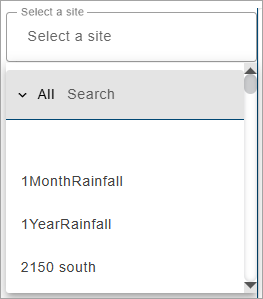
This panel contains the fields used to select the source data for the alarm. The Select Site field is populated with all sites in the instance.
2. Click in the Select a site field to expand the field.
If the user has been assigned to a tenant, the list will only contain the sites in that tenant. Similarly, if Preferred Tags have been specified in the Preferences tab of the current user profile, the list will display a "Tags applied" indicator and only sites assigned those tags will be included in the list. If the "Show inactive sites..." option has not been enabled in the Preferences tab, only active sites will be available. See Preferences for more information on these options.
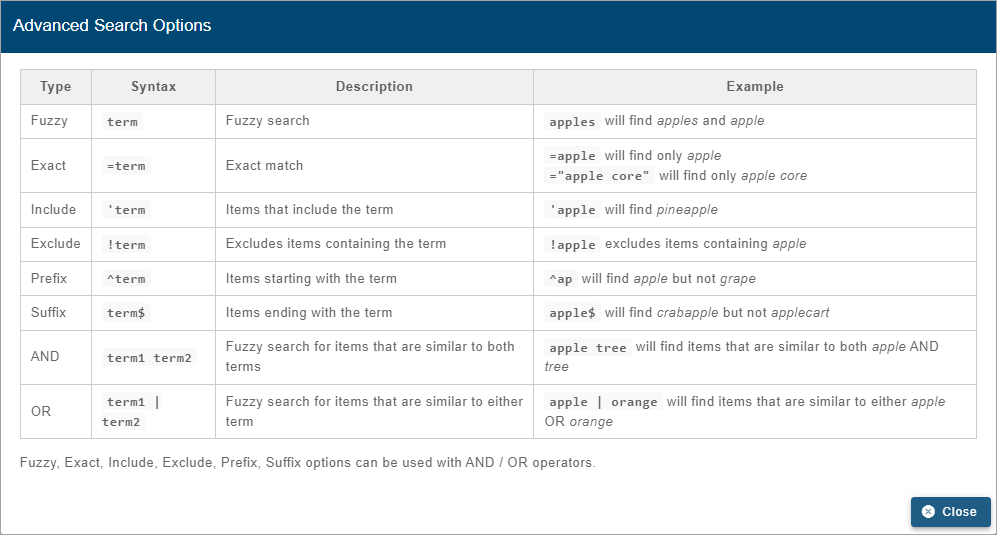
The list of sites can be filtered by entering text in the Search field. Only sites that match the text specified will be included in the list. Advanced Search characters can also be specified with the text to perform different types of searches, some more specific, some more general. Clicking the Advanced Search Options link below the Search field will display a chart of the possible search types and how to use them. The AND/OR operators can also be used in combination with the other Advanced Search options if needed.
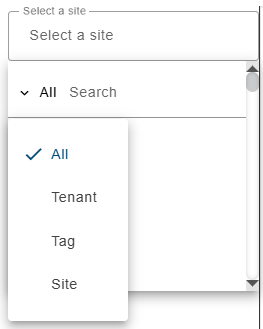
A drop-down list beside the Search field can be used to filter the list even further by specifying the property in which to search for the matching text. Also, when a property is selected from the drop-down list, clicking in the Search field will display a drop-down list of possible values based on the selected property, allowing a value to be selected instead of entering it manually. When an option is selected, only sites with text in the selected property (tag, site, etc.) will be available.
3. Select a site from the list.
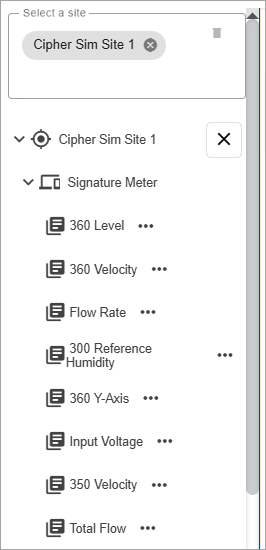
All ingested datasets and computed datasets available for the selected site will be displayed in a drop-down list. Additional sites can be selected to display more datasets if needed.
4. [Optional] Click in the Select Site field again and select additional sites as needed.
5. Expand the datasets drop-down lists to view the available datasets.
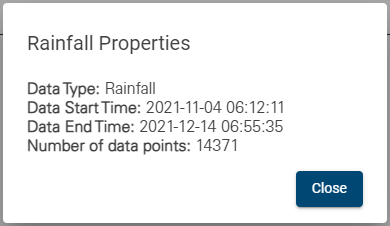
The Properties button (...) beside each dataset in the list displays a dialog box containing information about the dataset.
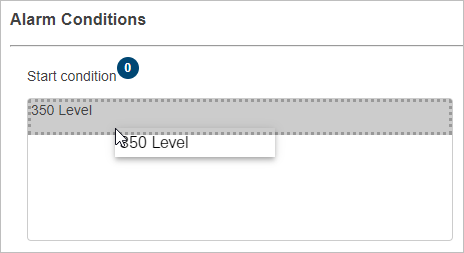
6. Select the dataset that you want to set a condition for and drag it to the top of the Start Condition list.
The dataset is only shown in the Start condition field because, by default, the End condition is the opposite of the Start condition and does not require the user to specify the criteria manually. If a custom end condition is required, the dataset can also be added to the End condition field and criteria specified.
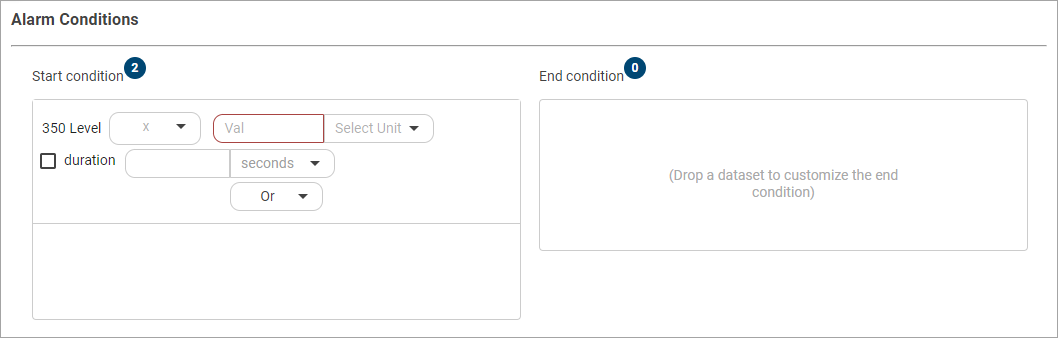
7. Select a conditional operator by clicking the drop-down arrow inside the Start condition field.
8. Click the Value field and type a value for the Start Condition.
9. Select a unit of measure for the value.
The Duration controls can be used to specify a length of time that the condition must be detected during ingestion in order for the conditions of the alarm to be met. For Rainfall data, the Duration option is renamed Within and will detect an event when the rain accumulation amount exceeds the limit within the specified time period.
10. [Optional] Click the check box to enable the Duration controls.
11. [Optional] Specify a value and unit for the duration.
12. [Optional] If defining a custom end condition, drag the relevant dataset to the End condition field.
13. [Optional] Select an operator and type a value for the End Condition.
The condition is now complete.
14. Click the Save Alarm button in the top-right corner.
You are returned to the Settings page and the new alarm is available in the list.
Related topics:
• Alarms