Flowlink Cipher is accessed via a web browser at the following URL: flowlinkcipher.com.
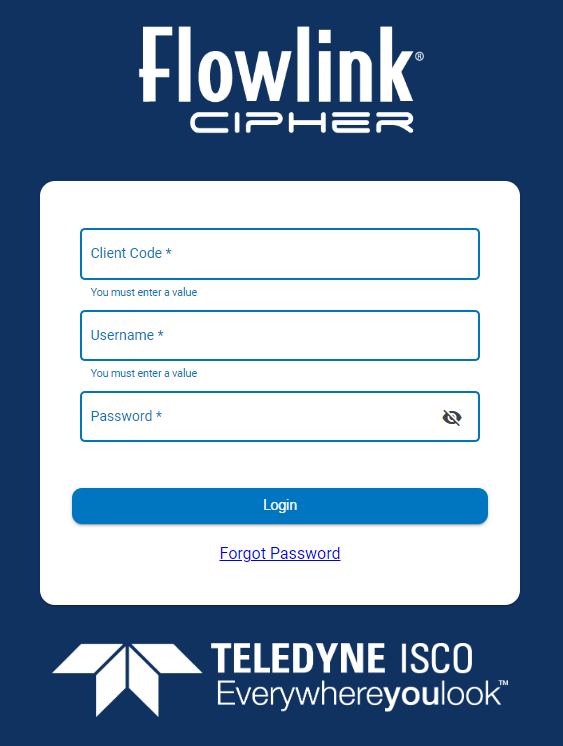
The launch page of the website provides a dialog box to enter user credentials to log into the system.
• Client Code: The name of the Flowlink Cipher instance to which you will be connected. Each Flowlink Cipher client has a different code. This ensures that users only have access to sites and data for their company.
• Username: The username associated with the user account being used to log in.
• Password: The password for the user account being used to log in. The button  at the end of the field can be used to toggle on/off the display of the characters entered for the password.
1. Enter the credentials for the user account in the fields available
2. Click Login.
Navigating Flowlink Cipher
Once signed into Flowlink Cipher, the functionality in the system is accessed through two main toolbars:
• the expanding sidebar at the left side of the page
• the toolbar at the top of the page
The expanding sidebar gives access to the main areas of the application, as well as the settings for the application. Each area can be accessed by clicking the relevant button in the sidebar. These buttons are populated according to the roles of the current user; some buttons may not be available if the user does not have the roles required to access the functionality.
Button | Description |
|---|---|
| Dashboard A Dashboard is the initial page displayed when Flowlink Cipher is launched. A dashboard contains "gadgets" to provide a quick overview of important data such as graphs, notes, alarms and so on. The gadgets displayed in a dashboard are selected and positioned by each user and remembered each time that user accesses the application. Users can have more than one dashboard if needed. For more information on dashboards, see Dashboards. |
| Map The Map page displays a map of all accessible site locations. The extents of the map are determined by the sites accessible to the current user; by default the map will be sized to display all available sites. See Map for more information. |
| Sites The Sites page is used to monitor and manage all sites accessible to the current user. Sites are locations of sensors and other measuring equipment. This page consists of two different sections. Click the links below to learn about each of the Site screens. |
| Alarms The Alarms page provides users with a list of events created to record alarms generated by the system. Alarms notify users when a predefined condition has been detected by sensors at a site based on the data values being ingested from a device. This page consists of two screens. Click the links below to learn about each of the Alarm screens. |
| Analysis The Analysis page is used to organize incoming sensor data into graphs that can then be used for data analysis. This page is divided into three screens. Click the links below to learn about each of the Analysis screens. • Graphs • Search |
| Reports The Reports page is used to create and view statistical reports about the sites and data in Flowlink Cipher. Click the links below to learn about the Reports page |
| Scheduler The Scheduler page is used to generate site statistics and health reports on recurring time intervals. Click the links below to learn about the Scheduler page. |
| Users The Users page is used to view, create, edit and manage user accounts in the Flowlink Cipher system. Different functionality is available based on the user role assigned to the currently active user account. Click the links below to learn about the Users page. • Users |
| Settings The Settings page provides administrator users with access to global system information and settings. Click the link below to learn about the Settings page. • Settings |
| Expand Navigation Bar This button is used to expand or collapse the navigation bar on the left side of the application. When expanded, full names are displayed for each section of the application. When collapsed, only the section buttons are displayed. |
The toolbar at the top of the interface provides common navigation buttons that are available in all areas of the application. These buttons are described in the table below.
Tool | Description |
|---|---|
| Jobs View a list of the data-import jobs that have been initiated by the current user.
A new job is created in the queue each time data is imported into Flowlink Cipher using the Data Import Utility. This list also provides the status of each job in the queue. The possible states include: • Waiting • Running • Complete Once is a job is complete, a notification will be added to the Notifications list indicating if the job was successful or not and options are displayed to download the data A Cancel Job button |
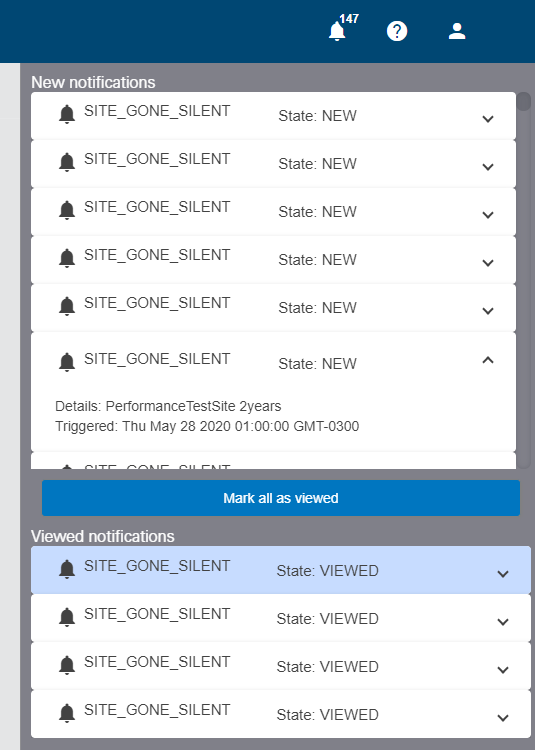
| Notifications View site notifications received by the application. Notifications are generated by various activities, such as new sites being added, data alarms being triggered or device alarms being triggered. New notifications are shown as a number beside the Notifications button when they are received by the system. 1. Click Notifications. A list of notifications is displayed. Clicking a notification in the list will open a dialog box populated with details about the notification.
2. For an individual notification click the Mark as viewed 3. Click the Mark all as viewed 4. Click the View All
When notifications have a status of Viewed, they are removed from the number of notifications reported for the See Notifications button. If there are no new notifications, clicking the See Notifications button will display the notifications panel, populated with notifications that have been previously marked as Viewed. Notifications are removed from this list once the event that triggered the notification has been acknowledged. Events can be acknowledged through a site gadget on the dashboard or from a site card on the Map page. See Dashboards and Map for more information. |
| Help The Help button opens a menu that provides access to the following functions: • Help • Release Notes • Send Feedback • About These functions are each explained below. |
Help View online help for Flowlink Cipher. 1. Click Help. The help is displayed in a separate web browser tab. In the top-left corner are icons to access the Table of Contents and an Index, as well as a Search field. 2. Use the tools provided to navigate to the desired information. Additional help is also available for the Flowlink Cipher API functionality. To access this content, the URL of the file location must be entered manually into the address bar of a web browser. The URL is specified as the Cipher deployment URL appended with "/swagger-ui/index.html". For example, the API documentation for deployment us2 would be:
| |
Release Notes View the online Release Notes for Flowlink Cipher, a report of changes made to the application since the release of the previous version of the application. 1. Click Release Notes. A separate web browser tab is opened with the most recent release notes displayed. All previous updates in the major release series are also accessible from this website. l | |
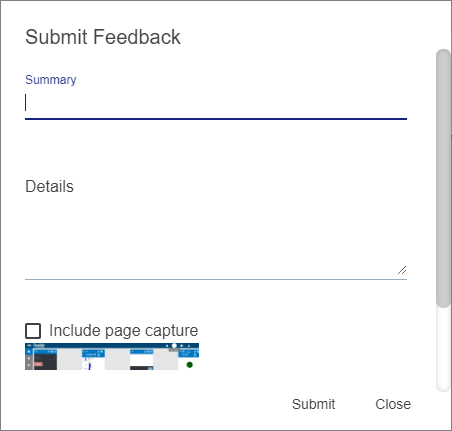
| Send Feedback Submit text and graphics to an email account at Teledyne ISCO which is monitored for feedback from Flowlink Cipher users. The email will include the client code of the customer that submitted the feedback to indicate which customer provided the feedback. 1. Click Report Feedback. The Submit Feedback dialog box is displayed.
2. Type a brief description in the Summary field. 3. Type a more detailed description in the Details section. You can include a screen capture of the currently active page (for example, a graph). 4. Select the Include page capture check box. 5. Click Submit. |
| About Launch the About Flowlink Cipher dialog box, which contains the version ID of the application and the Terms of Use for the application license. 1. Click Close to return to the application. |
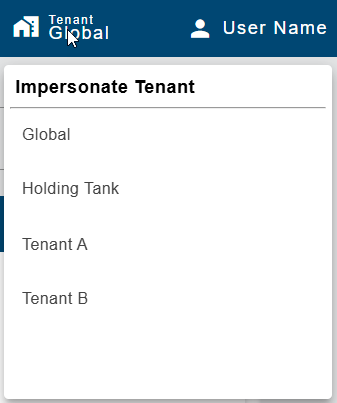
| Impersonate Tenant This tool allows a system administrator to temporarily impersonate an account in a tenant. When impersonating a tenant account, the system administrator will retain their normal system access, but data access will be limited to only the sites, data and events that are available to a user in the selected tenant. This is useful for troubleshooting user issues in a tenant. Note: This tool is not displayed if the current user does not have the System Administrator role. 1. Click the Impersonate Tenant button. A list of available tenants is displayed.
2. Select the relevant tenant from the list. The system administrator can now interact with the sites, graphs, data and events available in the selected tenant, experiencing them in the same way that a user in the tenant would. 3. When finished, click the Impersonate Tenant button again and select the Global tenant to return to normal access. |
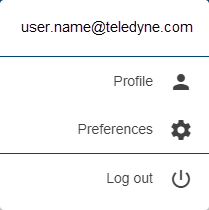
| Profile The Profile button displays the following menu. The appearance of this button will differ for each user as it is populated with either the initials of the user name for the current user account, or with an image that has been specified as the avatar for the user account. See for information on selecting an avatar image.
In this menu you will find: • the email address of the user account currently logged into the application • a link to the profile settings of the current user account, see User Profile for more information on this tool • a command to log out of the application |


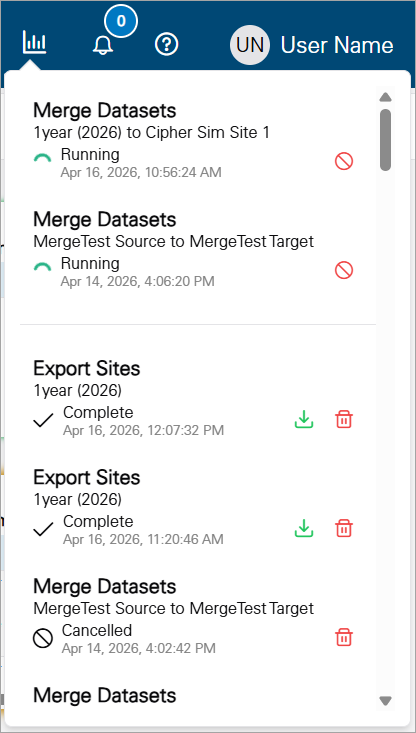
 or delete the job
  .
. is also provided to cancel a job that has a status of Waiting or Running. A Delete button is provided to delete cancelled jobs.

 button to change the status of the notification to VIEWED.
 button to change the status of all the notifications to VIEWED.
  button to view the list of the notifications in a panel that expands from the right edge of the application. In this list, you can click each notification to view more details. As each notification is opened it is marked as VIEWED and moves to the